Ключевые моменты видеоурока для выполнения
Руководство по использованию ИИ-инструментов Filmora
Open Wondershare Filmora on your computer system. Click on "New Project" to start a new project. Import your video clips by selecting the "Import" option and choosing the desired videos from your files.
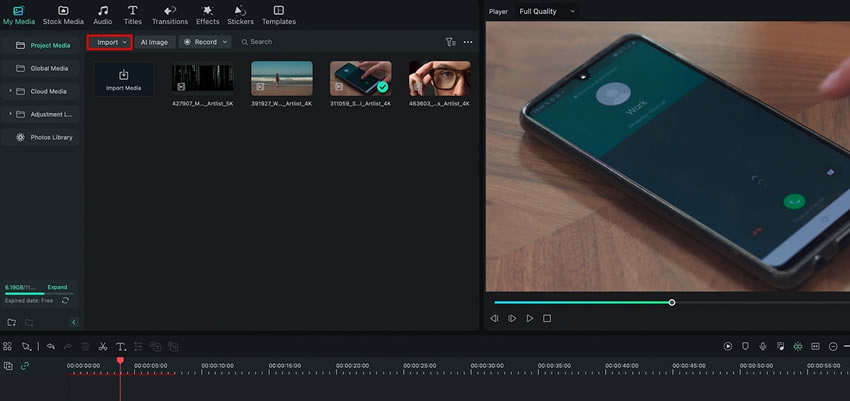
Drag and drop the background video into the first track of the timeline and bring the video you want to mask into the second track of the timeline. Select the video you want to mask by left-clicking on it in the second track. On the settings panel located on the screen, select the "Mask" option.
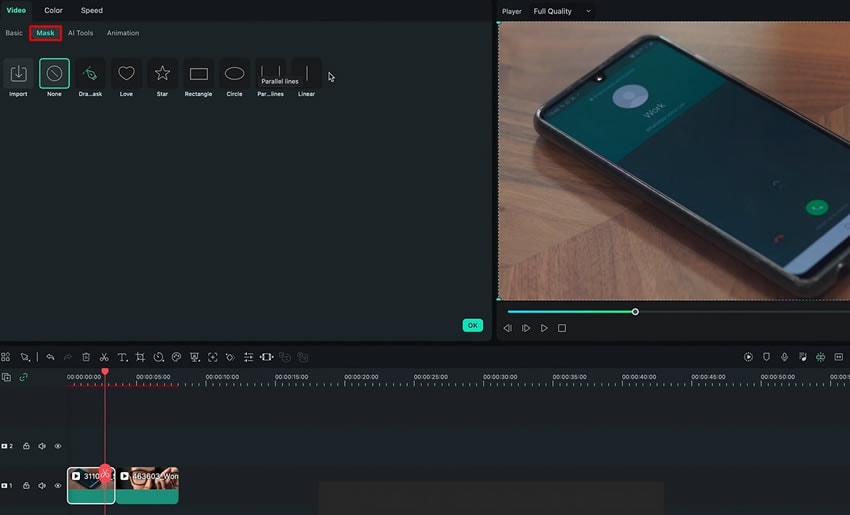
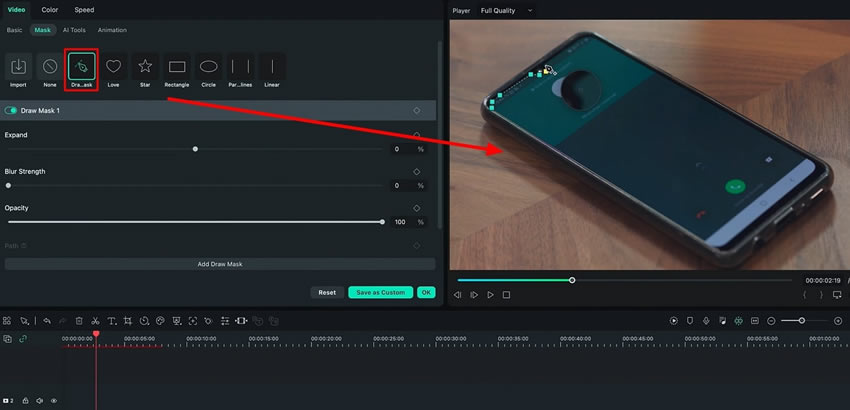
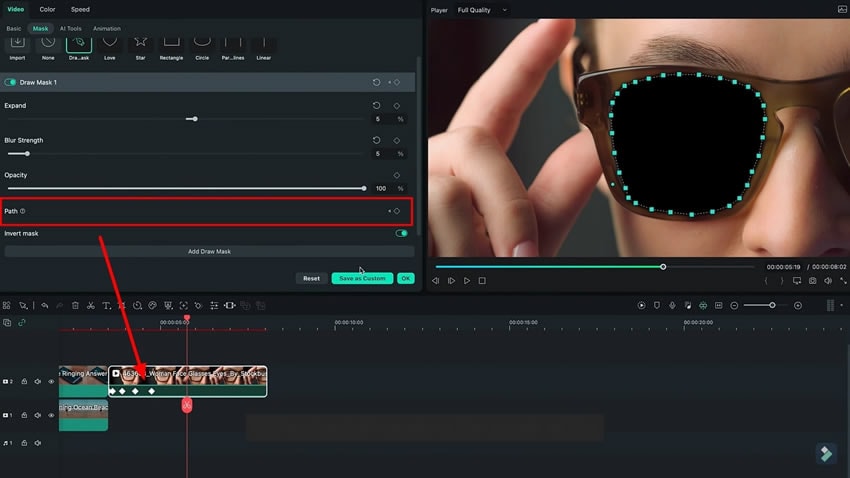
Choose "Draw Mask" from the available options in the settings panel. Start drawing the mask by clicking and dragging the cursor on the area where you want the background video to appear.
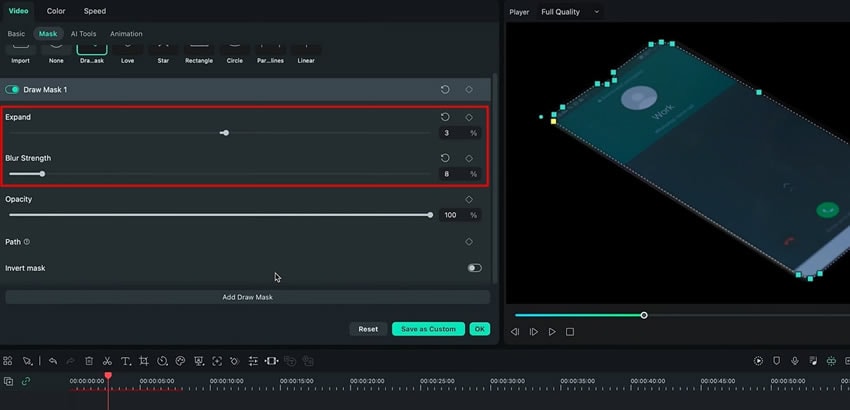
Once the mask is drawn, adjust the mask parameters as needed. Increase the "Blur Strength" to make the masked area blend better with the background. Use the "Expand" option to adjust the size of the masked area if necessary.
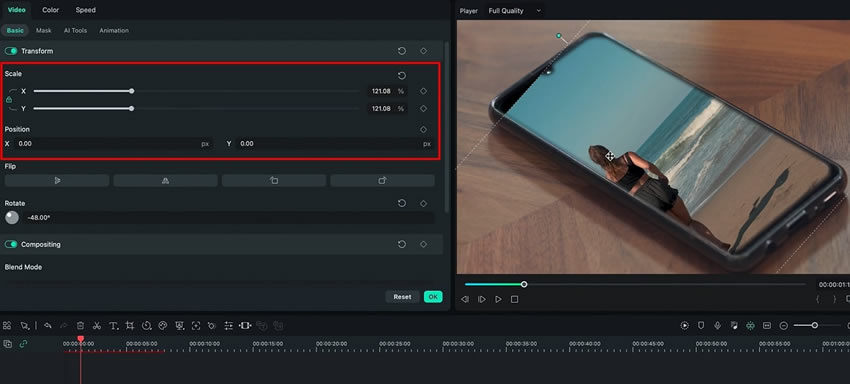
Click on the background video in the first track to select it. Change the "Scale" and "Position" settings of the background video to fit the masked area properly.
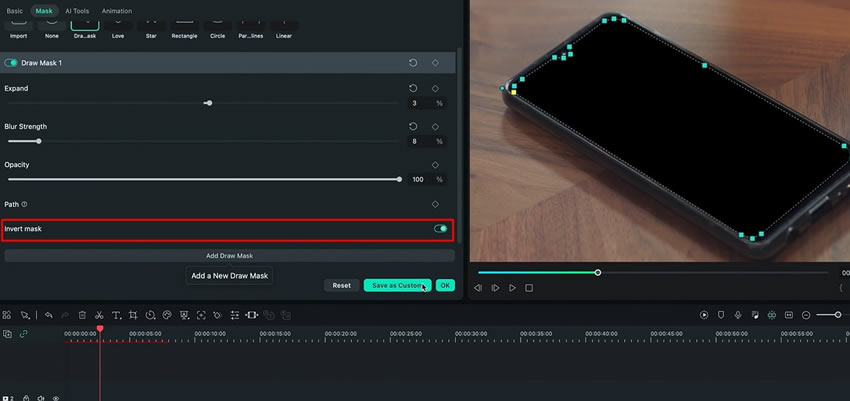
Once everything is aligned and adjusted, make sure to click the "Invert Mask" option by selecting the video in the second track.
If the object in the masked video is moving, you need to add keyframes for more accurate masking. Set keyframes for the "Draw Mask" option to adjust the mask shape over time. Optionally, set keyframes for the "Path" option to modify the movement of the mask. By following the above steps, you can effectively mask your video to create VFX effects in your video project.
Visual effects, without any doubt, have the power to take your storytelling to new heights. With many tools and effects available, anyone can apply VFX to their content. Sometimes you need to take your content to a new dimension by creating your own effect. Using masks in Filmora, you can isolate areas of your footage and selectively apply VFX effects.
Другие мастер-классы Луки по использованию Filmora
