Ключевые моменты видеоурока для выполнения
Руководство по использованию ИИ-инструментов Filmora
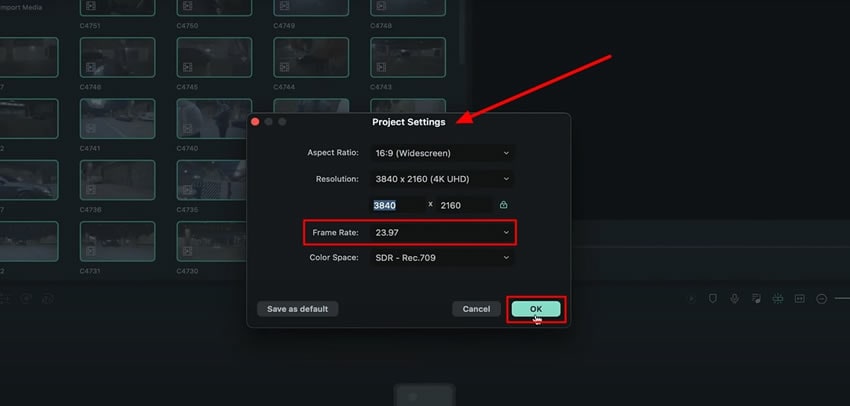
Start a new project by hitting the "New Project" button from the main interface. Import your media files and move toward the "Files" menu. Look for "Project Settings" from the dropdown list. A new window will appear on the screen. Here, you can adjust the "Resolution," "Aspect Ratio," and "Frame rates." Hit the "Frame Rate" and select 23.97 fps, and continue to click “OK” to save these settings.

Go to the media panel and double-click the video clip. You need to select the "Keep the Project Settings" option from the pop-up window. Select the video on the timeline and slow it down to make your video run at your required framerate. You can calculate the required speed by dividing the adjusted framerates by the original frame rate.
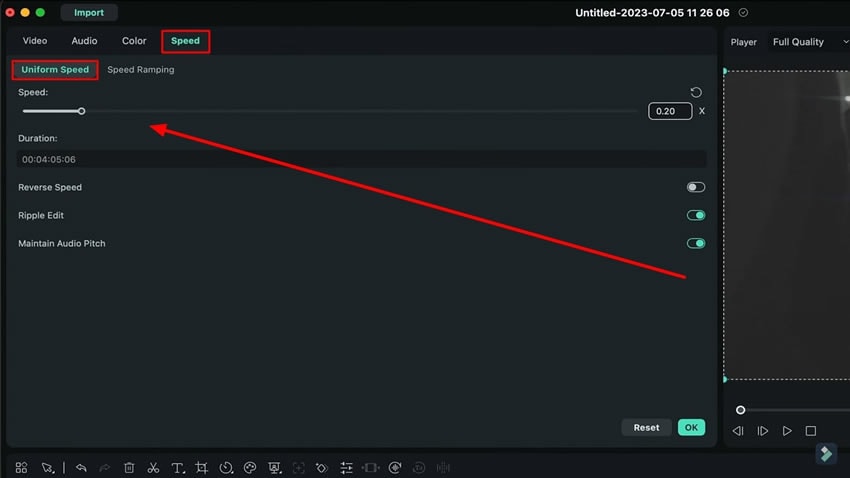
Double-click the video and navigate to the “Speed” tab in the settings window. Under the "Uniform Speed," adjust the speed by moving the slider, or write it exactly in the available space. Hit “OK” to save this speed for your specific video.

Working with multiple frame rates is no more a mystery now. In this guide, you have learned to change video frame rates and the video speed accordingly. Now you can create impressive content with professional touch by using Filmora. The best part is you no longer require any professional skill to do so.
Другие мастер-классы Джоша по использованию Filmora


